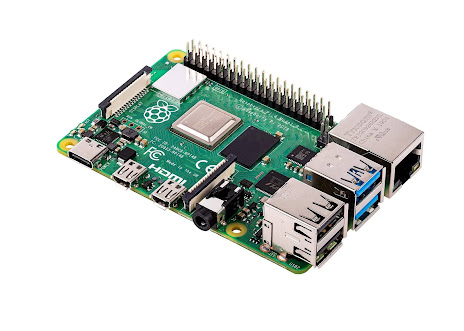
Manual Start Wifi with a USB Dongle on Raspberry Pi 4B
My Manual Wifi notes
Note that the TP Link TL-WN823N rtl8192eu chip, has driver problems and does not connect with a Wifi Access Point using the wpa_supplicant program.
The "ifconfig wlan0 up scan" does work to view nearby access points.
# edit 3 Files to add configuration lines into /boot/loader.conf /etc/rc.conf /etc/wpa_supplicant.conf
# for the file /boot/loader.conf
# using Keyboard, change into the 'root' user, before editing. on a stock FreeBSD snapshot the sudo command is not installed
su -
root_password
ee /boot/loader.conf
if_rtwn_load="YES"
if_rtwn_usb_load="YES"
legal.realtek.license_ack=1
#/etc/rc.conf add 2 lines for TP Link TL-WN823N rtl8192eu chip
wlans_rtwn0="wlan0"
ifconfig_rtwn0="SYNC DHCP"
Bare minimum fields necessary for an encrypted Wi-Fi connection using wpa_supplicant command. Edit file /etc/wpa_supplicant.conf
network={
#: my NetGear box
ssid="NETGEAR59"
psk="my_passkey_892"
key_mgmt=WPA-PSK
}
#/etc/wpa_supplicant.conf example file for an Open Network connection to Wireless SSID name "innflux"
network={
ssid="innflux"
key_mgmt=NONE
}
#Manually issue the wpa_supplicant with the background Dameon option and dhclient commands
wpa_supplicant -B -i wlan0 -c /etc/wpa_supplicant.conf
dhclient wlan0
#Use the following line for testing with the Debug and Password debug printout options
wpa_supplicant -d -K -i wlan0 -c /etc/wpa_supplicant.conf
dhclient wlan0
#Problems running dhclient? Then kill the previously running dhclient.
killall dhclient
dhclient wlan0
#create rtwn0 device just one time issue this command
ifconfig wlan0 create wlandev rtwn0
ifconfigsudo ee /etc/wpa_supplicant.confnetwork={
ssid="Your_SSID"
psk="Your_Password"
}- Replace Your_SSID with your WiFi network name.
- Replace Your_Password with your WiFi password.
- For open networks, omit the psk line.
- For advanced configurations (e.g., WPA-Enterprise), refer to man wpa_supplicant.conf.
sudo chmod 600 /etc/wpa_supplicant.confsudo ifconfig wlan0 create wlandev ath0- Replace ath0 with your actual WiFi device name (check ifconfig output).
- Set the interface up:
sudo ifconfig wlan0 upsudo wpa_supplicant -i wlan0 -c /etc/wpa_supplicant.conf -B- -i wlan0: Specifies the interface.
- -c /etc/wpa_supplicant.conf: Points to the configuration file.
- -B: Runs wpa_supplicant in the background.
ifconfig wlan0sudo dhclient wlan0- This starts the DHCP client to obtain an IP address from the access point.
- Verify the IP assignment:
ifconfig wlan0ping -c 4 8.8.8.8sudo sysrc wlans_ath0="wlan0"
sudo sysrc ifconfig_wlan0="WPA DHCP"- Replace ath0 with your WiFi device name.
- This configures wlan0 to use WPA and DHCP automatically on boot.
sudo sysrc wpa_supplicant_enable="YES"- Interface not found: Verify the interface name with ifconfig.
- Authentication fails: Check /etc/wpa_supplicant.conf for correct SSID/password. Use wpa_supplicant without -B to see debug output.
- No IP address: Ensure dhclient is running (ps aux | grep dhclient) and the access point provides DHCP.
- Logs: Check /var/log/messages or run sudo dmesg for errors.
- man ifconfig
- man wpa_supplicant
- man dhclient
- FreeBSD Handbook: Wireless Networking

Here add a comment of your own, after this comment, Fred
ReplyDelete